


Fast Chromatin Immunoprecipitation Assay
1. Introduction
The chromatin immunoprecipitation assay (ChIP assay) has greatly facilitated the expansion of our knowledge of the protein–DNA interactions involved in regulating gene expression, DNA repair, and cell division. The function of the assay is that it gives a researcher the ability to not only detect a specific protein–DNA interaction in vivo, but also determine the relative density of factors along genes or the entire genome. Though powerful, the traditional ChIP assay is time consuming (involving 2 days or more) and laborious. The Fast ChIP assay can greatly reduce the time and labor involved. The improved assay is especially useful for studies which involve many samples, including the probing of multiple chromatin factors simultaneously and/or looking at genomic events over several time points.
2. Principle
The slowest step of the traditional ChIP assay is the 5 h reversal of cross-linking and the most laborious step is the DNA cleanup, which involves phenol:chloroform extractions and ethanol precipitation. In Fast ChIP, cross-links are reversed during a 10 min incubation at 100°C in the presence of Chelex-100. In addition, since Fast ChIP does not require the addition of sodium bicarbonate/SDS buffer to elute the chromatin from the beads (the high temperature is sufficient), the DNA cleanup step is not necessary. After the 100°C incubation, the DNA containing supernatant is directly used in PCR. Another improvement in Fast ChIP is the use of an ultrasonic bath to increase the rate of antibody–chromatin interaction. In the traditional ChIP assay, the antibody–chromatin incubation can take anywhere from 1 h to overnight. With the use of the ultrasonic bath, this incubation is decreased to 15 min. The combination of these two improvements in Fast ChIP not only allows the assay to be easily completed in 1 day, but also gives enough time for the products to be analyzed by qPCR in the same day.
3. Workflow
The ChIP assay begins with the cross-linking of protein–DNA complexes by the fixation of cells/tissues with formaldehyde. After lysing the cells, the nuclei are disrupted and the chromatin is sheared either by sonication or by digestion with micrococcal nuclease. The chromatin fragments, typically between 500 and 1,000 base pairs in length, are immunoprecipitated using an antibody specific to the protein of interest. After reversing the cross-links, the DNA is isolated and used in one of the several detection methods including dot/slot blot, PCR or qPCR, hybridization to a DNA microarray (ChIP-chip), or sequenced using a rapid sequencing technology (ChIP-seq). Enrichment of a particular DNA region over other sites where the factor is not expected to bind indicates that the protein interacts with this region.
 Figure 1. A suggested workflow for the Fast ChIP assay.
4. Materials
(1) Reagents: Protein A–Sepharose; phosphate buffered saline (PBS); SYBR Green PCR Master Mix.
(2) Buffers and Solutions: glycine; IP buffer; Lysis/sonication buffer; Chelex-100; proteinase K; TE.
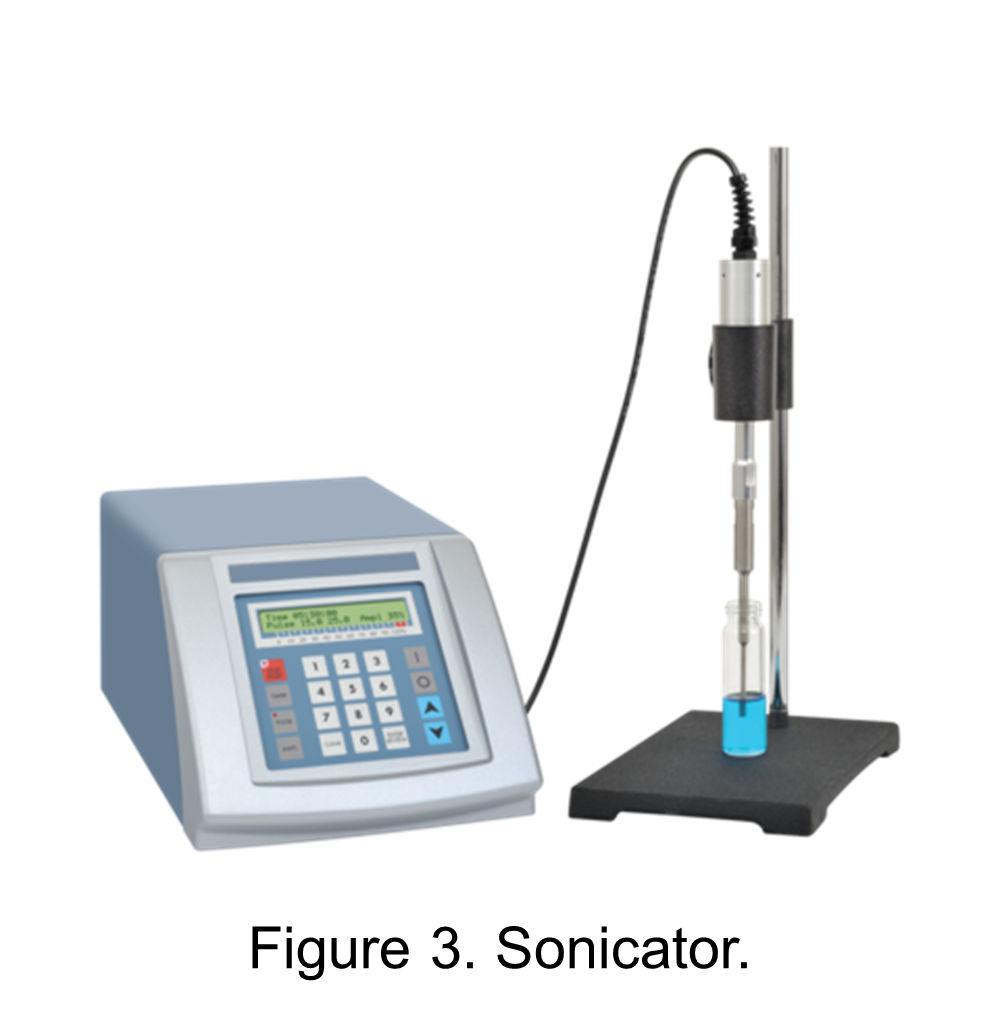
(3) Equipment: sonicator; refrigerated microcentrifuge; heat blocks and hot plate; tube rotator; ultrasonic bath.
5. Procedure
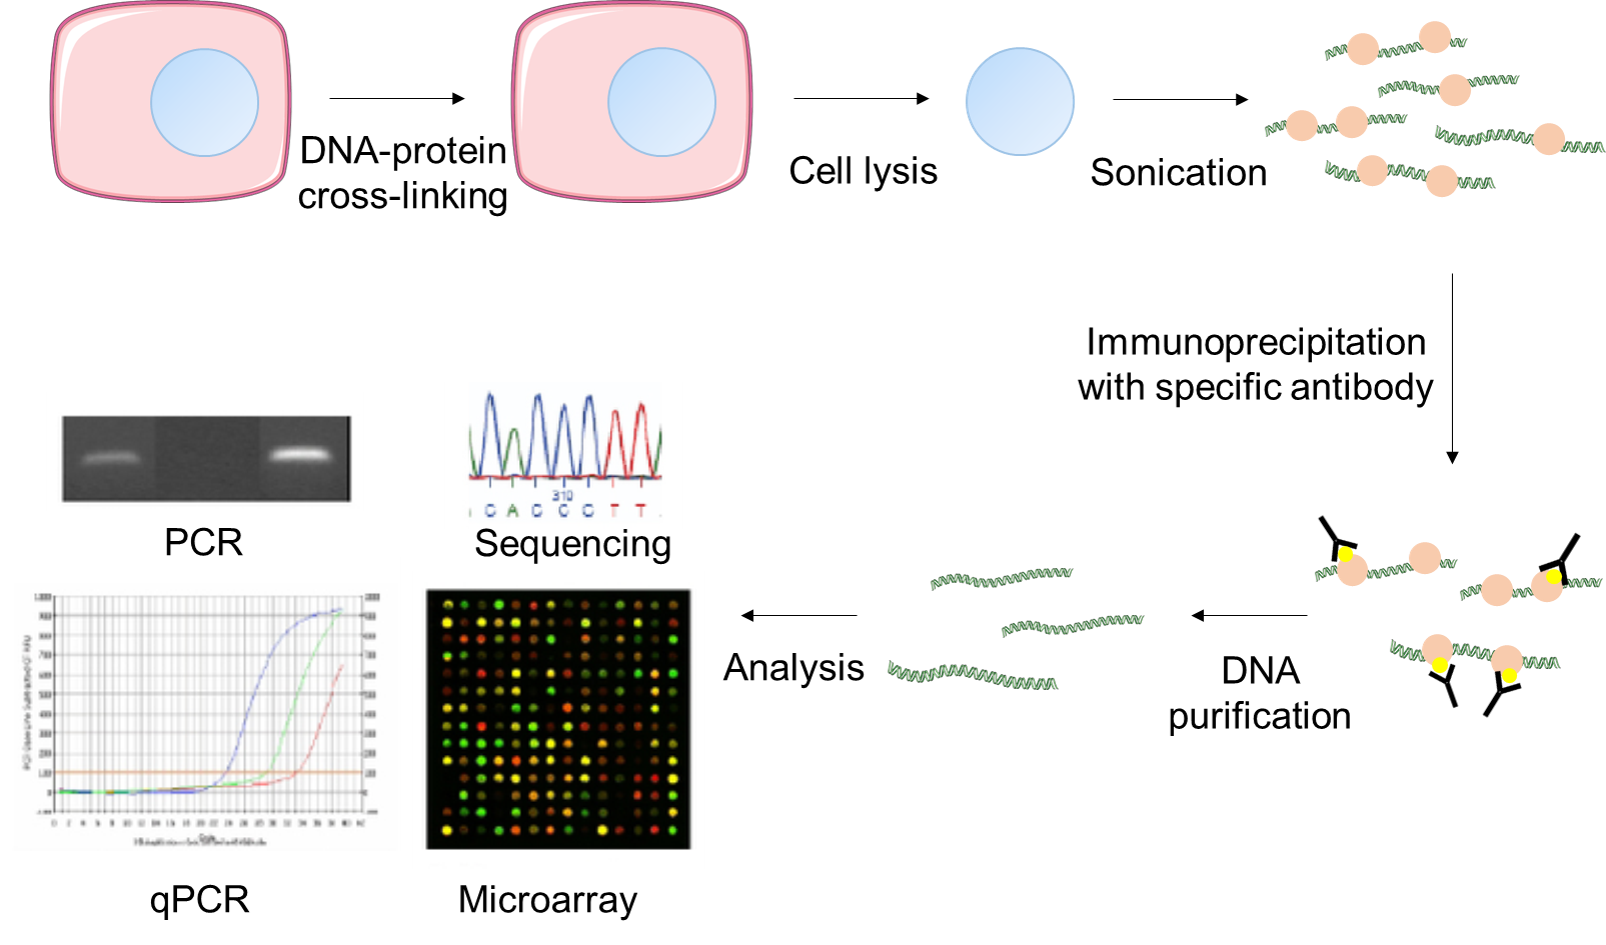 Figure 2. Experimental flow chart of the Fast ChIP assay.
5.1. Cross-Linking
(1) Approximately 4×10⁵–106 cells are required per IP sample.
(2) Add 40 μL 37% formaldehyde per milliliter of tissue culture medium directly, swirl the dish/flask and incubate for 15 min.
(3) Quench formaldehyde by adding 141 μL of 1 M glycine per milliliter of medium and incubate for 5 min.
(4) Harvest cells by scraping and centrifuging at 2,000g for 5 min (4°C).
(5) Keep cells on ice and wash twice with ice-cold IP buffer. The cell pellet can be stored at –80°C.
5.2. Sonication
(1) Lyse approximately 107 cells by resuspending in 1 mL icecold lysis/sonication buffer and pipetting up and down several times.
(2) Collect the insoluble material by centrifuging at 12,000g for 1 min (4°C).
(3) Repeat the step (1) and (2) once more, collect the pellet by centrifugation and aspirate the supernatant.
(4) Resuspend the pellet in 1 mL ice-cold lysis/sonication buffer, and split into two 500 μL fractions.
(5) The protocol used for sonication can vary widely and must be optimized for each cell or tissue type and sonicator setup.
(6) After sonication, the chromatin should be cleared by centrifugation at 12,000g for 10 min (4°C).
(7) Transfer the supernatant to a new tube and aliquot for storage at –80°C. Save one aliquot of 10 μL for extracting total DNA for the ‘input’ sample.
5.3. Isolating Total DNA (Input Sample)
(1) Precipitate DNA from the 10 μl aliquot for 10 min with 30 μL absolute or 96% ethanol.
(2) Pellet the DNA by centrifugation at 12,000g for 3 min (4°C).
(3) Aspirate or decant the supernatant and add 50 μL 75% ethanol.
(4) Centrifuge at 12,000g for 1 min (4°C), and remove as much of the supernatant as possible.
(5) Dry the pellets to completion.
(6) Add 100 μL of 10% Chelex-100 slurry to the dried pellets.
(7) Boil for 10 min and cool by centrifuging for 1 min (4°C).
(8) Add 1 μL of 20 μg/μL proteinase K to each tube and vortex. Briefly centrifuge to bring contents to the bottom of the tube.
(9) Incubate at 55°C for 30 min, gently resuspending the Chelex once or twice during the incubation.
(10) Boil for 10 min and centrifuge the condensate to the bottom of the tube at 10,000g for 1 min (4°C).
(11) Transfer 80 μL of the supernatant to a new tube.
(12) Add 120 μL ddH2O to each tube containing Chelex slurry, vortex, and centrifuge the contents to the bottom of the tube.
(13) Remove 120 μL of the supernatant and pool with the 80 mL supernatant from Step (10).
(14) The DNA can be run undiluted on 1% agarose. For PCR, use no less than a 1:20 dilution in TE, since some of the remaining contaminants can be inhibitory to PCR.
5.4. Immunoprecipitation
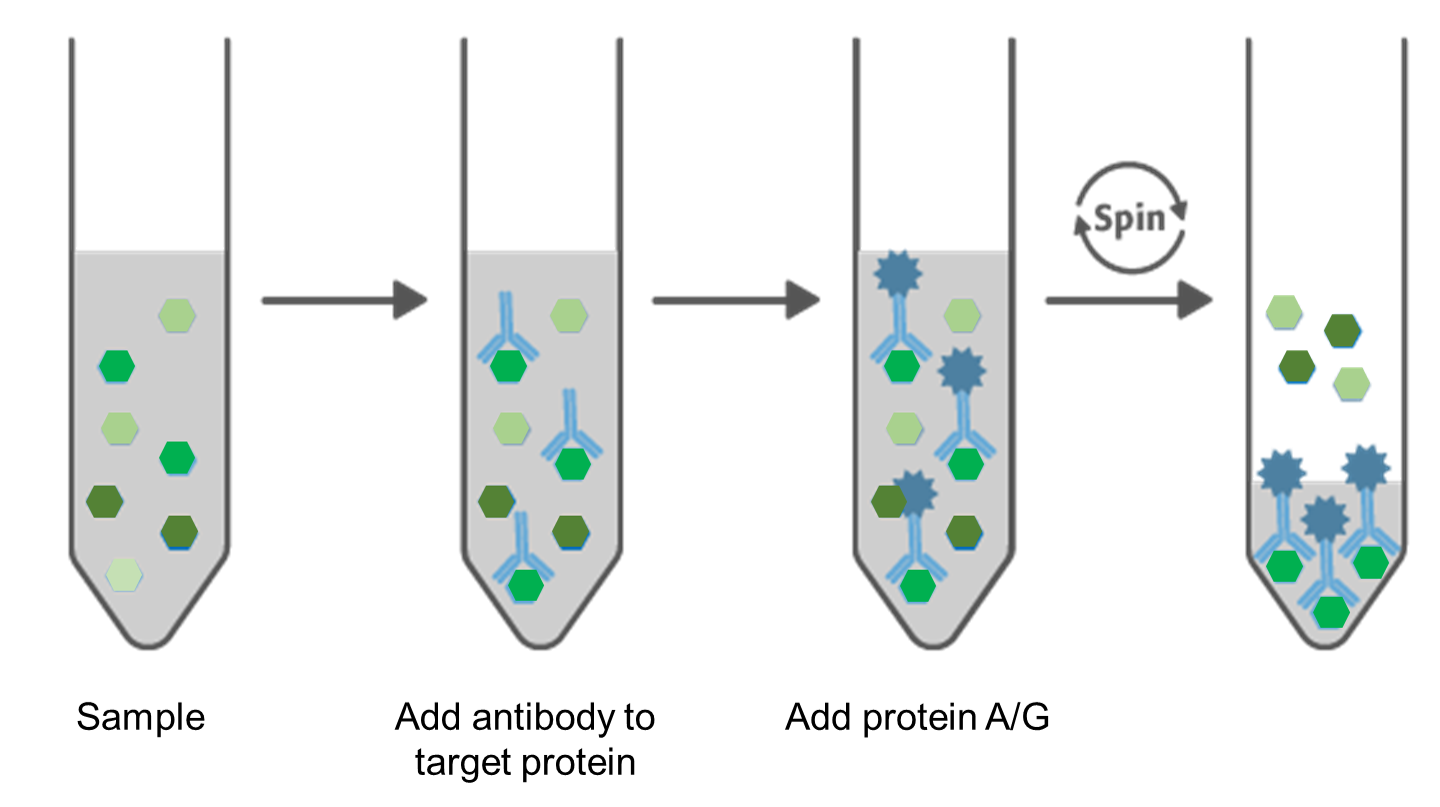 Figure 4. Principle of Immunoprecipitation.
(1) For each IP sample, dilute the equivalent of 1×10⁶ cells of chromatin to 200 μL with ice-cold lysis/sonication buffer.
(2) Add specific or mock antibodies to each sample and mix by inverting.
(3) Float samples in the ultrasonic bath for 15 min at 4°C.
(4) Clear the solution by centrifugation at 12,000g for 10 min (4°C).
(5) While the chromatin and antibodies are incubating, transfer approximately 20 μL per IP sample of protein A agarose slurry to a clean tube. Wash 1–3 times with IP buffer to remove ethanol.
(6) Resuspend beads in 180 μL IP buffer for every 20 μL of beads. Dispense 200 μL of the diluted slurry to new tubes, 1 tube for each IP sample. Centrifuge and aspirate buffer. Visually inspect tubes to make sure each one has the same amount of beads.
(7) Transfer no more than the top 90% of each cleared chromatin sample from Step (4) (avoiding the pellet at the bottom of the tube) to the tubes with the beads.
(8) Rotate tubes at 4°C for 45 min with a rotating platform or tumbler. The rotation should be fast enough to keep the beads suspended.
(9) Centrifuge the tubes at 10,000g for 1 min (4°C) and aspirate the supernatant.
(10) Wash the beads five times with 1 mL ice-cold IP buffer. After the last wash, remove as much supernatant as possible without removing the beads.
(11) Add 100 μL of 10% Chelex-100 slurry to the washed beads.
(12) Add 1 μL of 20 μg/μL proteinase K to each tube and vortex. Briefly centrifuge contents to the bottom of the tube.
(13) Incubate at 55°C for 30 min. Gently resuspend beads and Chelex-100 once or twice during the incubation.
(14) Boil samples for 10 min.
(15) Centrifuge samples at 10,000g for 1 min (4°C) to cool samples and bring condensate to the bottom of the tube.
(16) Transfer 80 μL of supernatant to new tubes.
(17) Add 120 μL ddH2O to each tube containing Chelex/protein A beads slurry, vortex, and centrifuge contents to the bottom of the tube.
(18) Remove 120 μL of the supernatant and pool with the 80 mL supernatant from Step (16).
(19) The PCR-ready DNA can be stored at –20°C and repeatedly thawed and frozen over several months without loss of PCR signal.
6. Notes
(1) The cross-linking times and formaldehyde concentrations used here are suggestions and may need to be optimized depending on the cell/tissue type used as well as on the factor being immunoprecipitated.
(2) Both PMSF and leupeptin have short half-lives in aqueous solutions at room temperature. It is important to prepare the lysis/sonication buffer fresh and keep it on ice before use.
(3) The chromatin preparations can be stored at –80°C for months without loss of pull-down efficiency; however, repeated thawing and freezing can reduce this efficiency.
(4) To reduce non-specific binding to the protein A beads, blocking reagents may be used to block the beads both prior to the IP and during the IP.
(5) For some antibodies the amount required may need to be determined empirically; however, 1–2 μg per sample is sufficient for many antibodies.
(6) If an ultrasonic bath is not available, samples may need to be incubated for 1–2 h at 4°C depending on the antibody.
(7) Non-specific binding of the chromatin to the protein A beads accounts for the majority of the mock signal. Therefore, reducing the amount of beads used may reduce the mock signal.
Reference:
- Nelson J, Denisenko O, Bomsztyk K. The Fast Chromatin Immunoprecipitation Method. Chromatin Immunoprecipitation Assays. Humana Press, 2009:45-57.